An easy to follow tutorial for how to make bread, including step by step photos showing how the dough should look, and how to shape it into loaves.
Making bread is actually a very simple process. I know a lot of people are intimidated by the idea of making their own bread at home, but I fully believe that anyone is capable of making great bread at home!
The basic process is just mixing flour, yeast, and water together, kneading the dough, letting it rise, shaping the loaves, letting it rise again, and baking.
Some recipes will only call for one rise instead of two. This usually means that there is more yeast added to the dough to get a quicker rise.
In that case, you skip the first rise and shape the bread right after kneading the dough.
Either way, it’s really not a difficult process, although it does take a little time.
Most of that time is not active time though, it’s just waiting time while the yeast works its magic.
If you’ve never tried making your own bread, I highly recommend it!
So today I’m going through the usual questions when it comes to making bread.
I’m basing this information on a typical loaf of sandwich bread, so some of it would not apply if you’re making something like ciabatta, which is a much wetter dough.
But sandwich bread recipes, like my white bread recipe that I’m using for this tutorial, are a great place to start if you’re new to bread baking.
What are the basic ingredients of bread?
At its most basic, bread is just flour, yeast, and water. That’s really all you need to make a fantastic loaf of bread.
Many bread recipes also have enrichments in them, such as butter or oil, milk, eggs, or an added sugar.
Darker breads typically use some molasses. Sweeter, richer breads will likely have a larger amount of sugar added, and quite likely some milk and butter.
In most cases, sweet breads, such as cinnamon rolls, will have milk, eggs, butter, and sugar.
The different additions to the base of flour, yeast, and water is what changes up the texture and flavour of the bread.
The ratio of flour to liquid will change in different recipes too, as some recipes will use a wetter dough than others.
Why is my homemade bread so dense?
Sometimes homemade bread can end up dense and there are a couple of different reasons for that.
One is not kneading the bread dough for long enough. If the dough isn’t kneaded enough, it won’t develop enough gluten to give it the light and airy texture that we all love.
Developing gluten in the dough is important, as this is what gives the bread it’s structure. If there isn’t enough gluten developed, the bread will have a dense structure.
So make sure to knead the dough for the full time listed in the recipe, as cutting it short will prevent the gluten from developing properly.
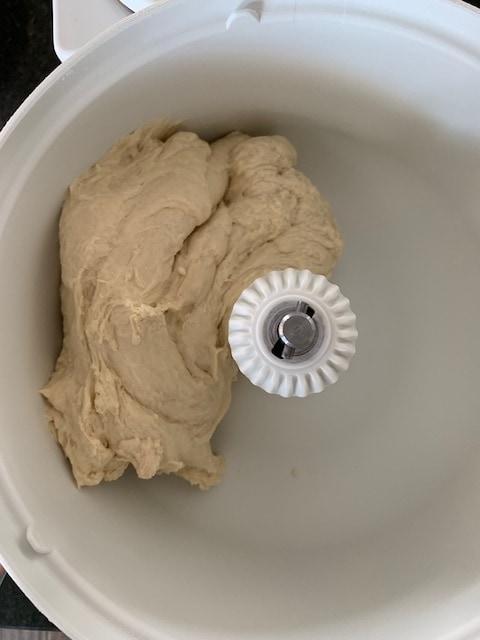
This is what bread dough will look like after being kneaded. It should be soft and smooth, and a bit tacky to the touch.
Another cause of dense bread is over flouring the bread dough.
The amount of flour in a bread recipe is not a strict amount, it’s more of a guideline.
For instance, my white bread recipe calls for 5 cups of flour, because that is typically what I need for it.
But the amount of flour that is actually needed will vary day to day based on a number of factors, such as how you measure flour, or the humidity that day.
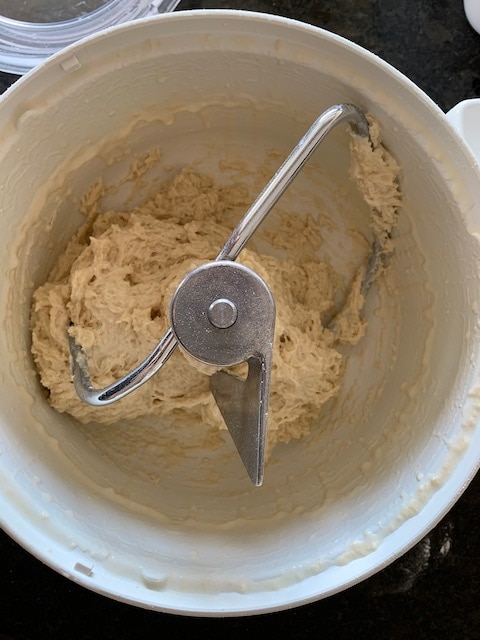
This is what under floured dough looks like. It is not clearing the sides and bottom of the bowl, and isn’t coming together. It would be too wet to shape into loaves, and needs more flour.
If you over flour the dough, you will end up with dense bread.
If you under flour it, it will be next to impossible to shape your loaves as the dough will be too sticky to shape properly.
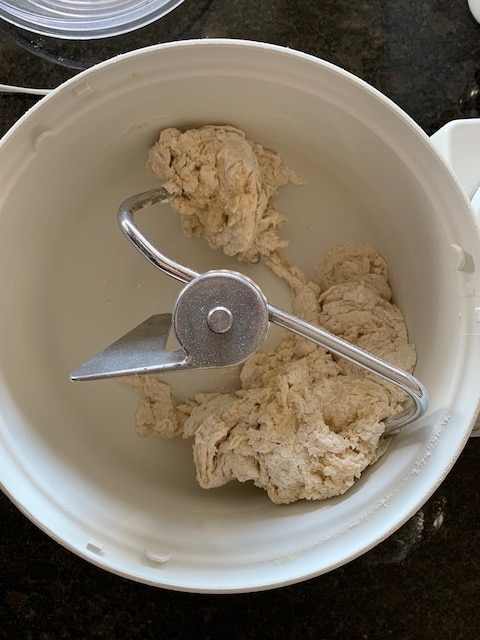
This is what over floured dough looks like. You can see dry bits of flour in the dough as there isn’t enough water to completely hydrate it. The bread would be very dense if more water is not added.
Correctly floured bread dough will be soft, smooth, and slightly tacky, but not overly sticky.
You should be able to pinch off a piece of dough and roll it between your hands into a smooth ball, without getting a whole bunch of dough stuck to your hands.
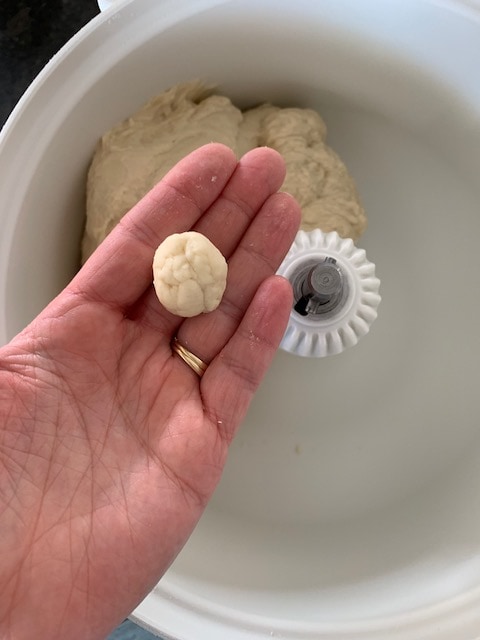
If you pinch off a piece of correctly floured dough before kneading, it will stick to your fingers a bit at first, but you should be able to roll it between your hands into a smooth ball like this. If it is too sticky to do so, you need a bit more flour.
Is active yeast the same as instant yeast?
No, active yeast and instant yeast are not the same.
They can both be used to leaven bread, and produce the same end result, but the way you use them in the recipe is different.
Active dry yeast needs to be dissolved in water with a bit of sugar before using it in your recipe, whereas instant yeast can be added directly to the dry ingredients.
For this reason, I prefer to use instant yeast, so any yeast bread recipes on my site will have instant yeast in them. But you can always use active dry yeast instead if you like.
Can you substitute active dry yeast for instant yeast?
Yes, in basically any recipe, you can substitute one kind of yeast for the other, as long as you use it correctly.
To use active dry yeast instead of instant yeast, multiply the amount needed by 1.25.
So if the recipe calls for 1 teaspoon of instant yeast, use 1 1/4 teaspoons active dry yeast instead.
You will also need to make sure to dissolve your active dry yeast in some of the liquid from the recipe before continuing.
For instance, my white bread recipe calls for 2 teaspoons of instant yeast and 1 cup of water. To use active dry yeast instead of instant yeast in this recipe, you would start by dissolving 2 1/2 teaspoons of active dry yeast in 1 cup of warm water, with 1 teaspoon of sugar.
Let this mixture sit for about 5 minutes, until it is foamy and bubbling, and then proceed with the rest of the recipe.
Just remember that you have already added 1 cup of water and 1 teaspoon of sugar, so adjust accordingly and don’t add the water again or you will have too much liquid in the dough.
You’ve added a bit of sugar already too, but that matters less – you can deduct the teaspoon of sugar from the total added if you like, but it’s not necessary.
How to Make Bread:
- The tutorial below shows the step by step process for making my white bread recipe. The same process would apply to a lot of bread recipes, even if some ingredients or times are different. This will give you a good starting point if you’re new to making bread, as it will show you how to tell whether your dough is floured correctly or not, and how to shape the dough into loaves.
- If you are looking for just the recipe without the step by step photos included, you can find that here: White Bread Recipe.
Here are some more great bread recipes for you:
- Whole Wheat Bread Recipe
- Soft Flatbread Recipe
- Icelandic Brown Bread
- Soft Pretzel Bites
- The Best Dinner Rolls
- Pepperoni Pizza Rolls
- Cinnamon Twists
How To Make Bread
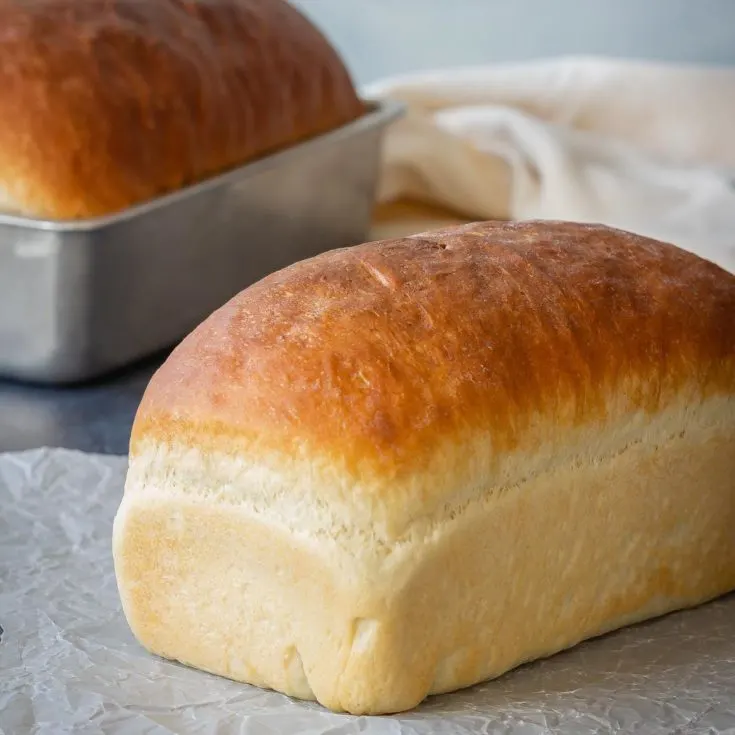
A tutorial showing the step by step process for how to make bread, using my White Bread Recipe.
Ingredients
- 1 cup milk (I use 2%), heated until steaming
- 2 tablespoons granulated sugar
- 2 teaspoons salt
- 2 tablespoons butter
- 1 cup warm water
- 5 cups all purpose flour
- 2 teaspoons instant yeast
Instructions
- Stir together warm milk, sugar, salt, butter, and water, until the butter is melted. Add the flour and instant yeast.
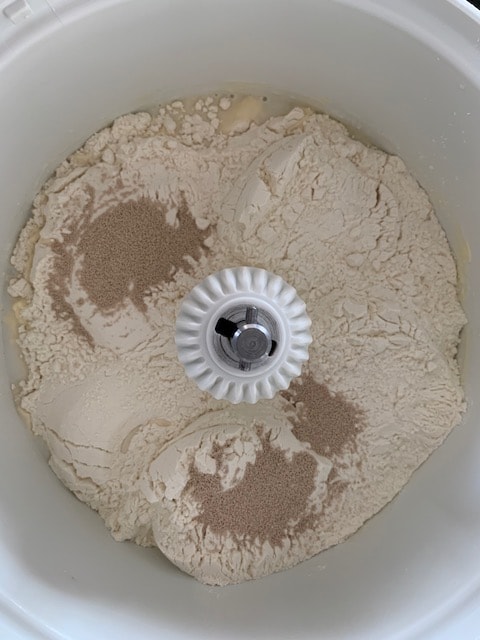
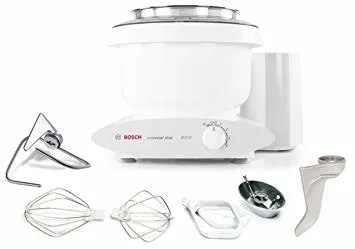
- Mix briefly with a dough hook in a stand mixer (or with a wooden spoon by hand) until the dough comes together and clears the sides and bottom of the bowl.
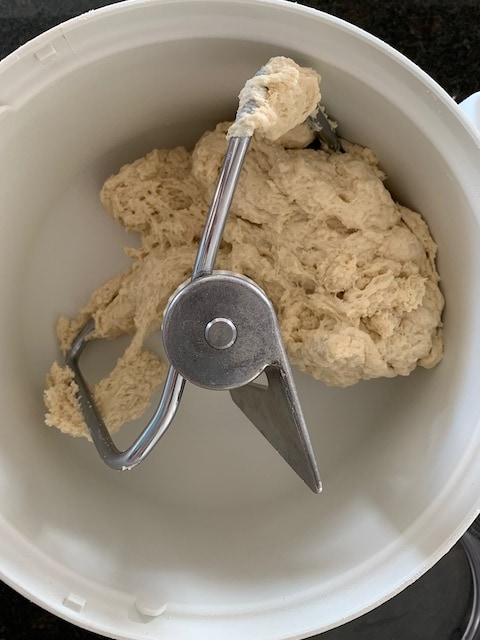
- If it is too wet and sticky to clear the bottom of the bowl, add a little more flour, a couple tablespoons at a time, until the dough clears the bottom of the bowl. This is a picture of under floured bread dough, you can see wet sticky dough on the sides and bottom of the bowl, it isn't coming together as there isn't enough flour in the dough to do so.

- If the dough is really dry and the flour is not completely mixing in, add a bit more water, a tablespoon at a time, until the dough comes together into a smooth ball. This is a picture of over floured bread dough, you can see bits of flour still as there isn't enough water to hydrate it all.

- The dough should be soft and slightly tacky to the touch, but not overly sticky. Pinch off a piece of dough. If it's floured correctly it will feel sticky, not dry, and will stick to your fingers a bit.
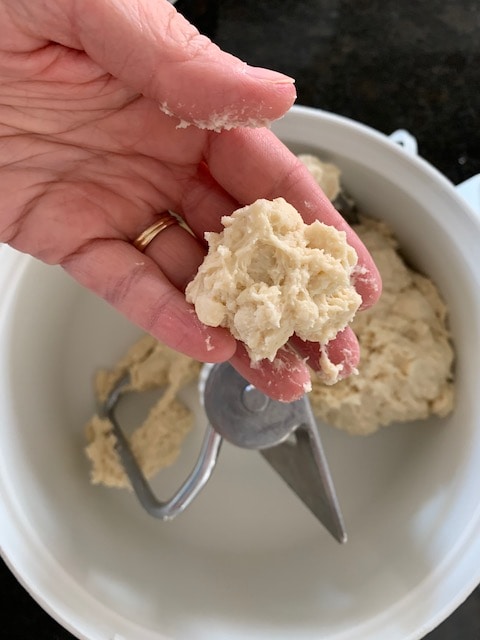
- Roll the dough between your hands. It should come together into a smooth ball. If it's too sticky to do so, add a bit of flour.

- Once the dough is floured correctly, knead it with the dough hook in a stand mixer for 5-6 minutes. Alternatively you can knead it by hand for 10-12 minutes.

- Transfer the dough to a lightly oiled bowl, turn it to coat, and cover it tightly with plastic wrap.
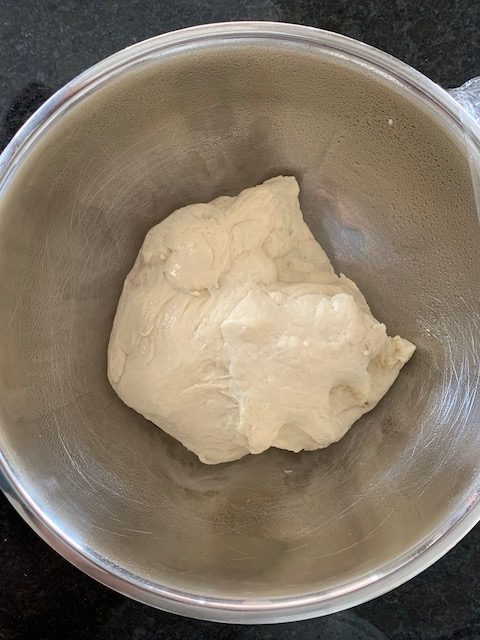
- Let the dough rise until doubled, about 60-90 minutes.
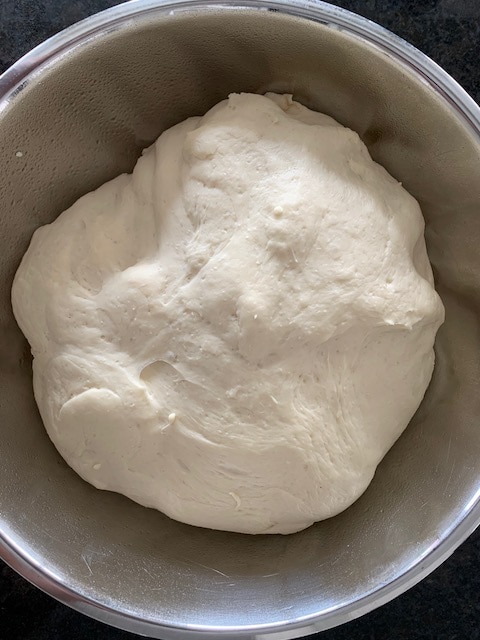
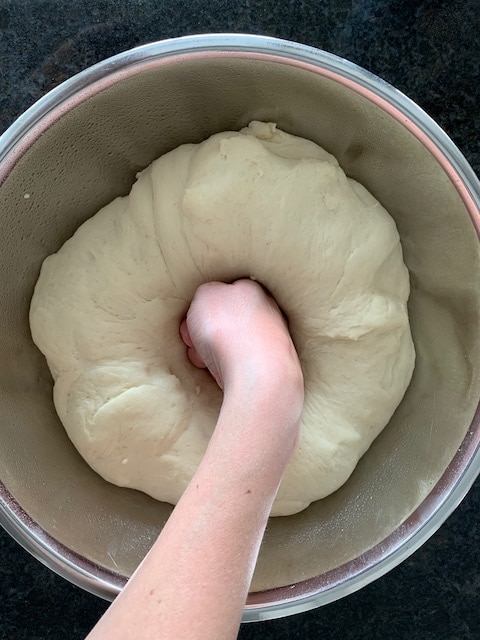
- Punch down the dough to remove the air bubbles.
- Turn the dough out onto a lightly oiled surface, and divide it into two equal pieces.
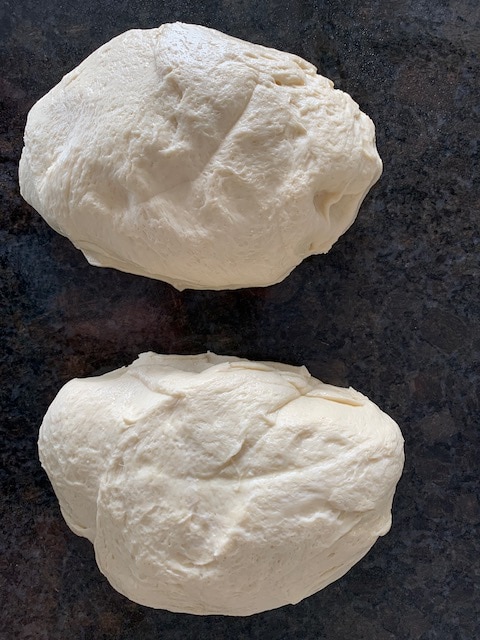
- Press one piece of dough out into a thick rectangle.
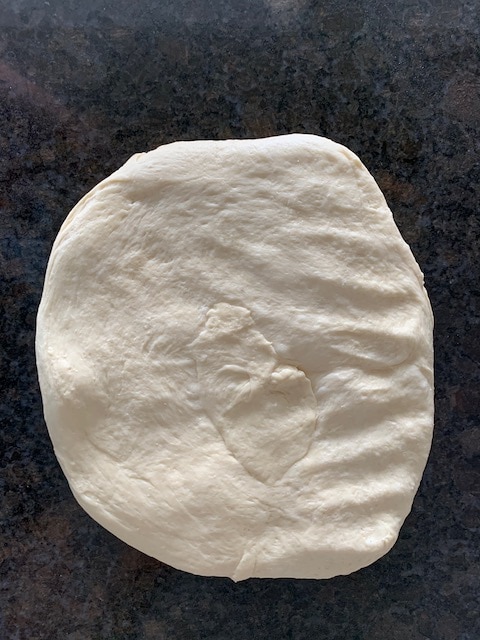
- Fold a third of the rectangle over.
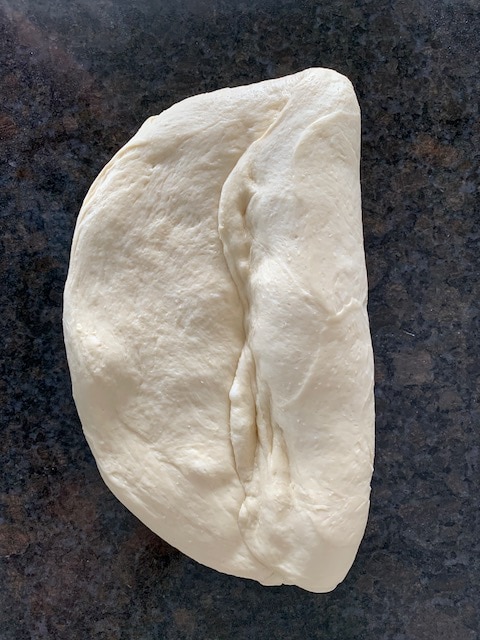
- Press the seam with the side of your hand to seal it.
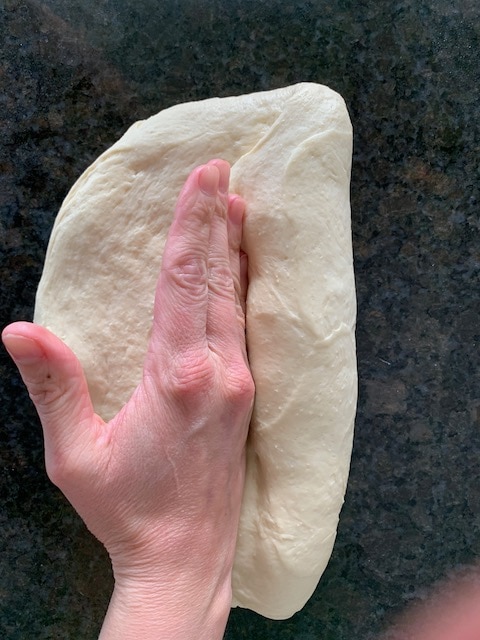
- Fold the corners in and press to seal the seams.
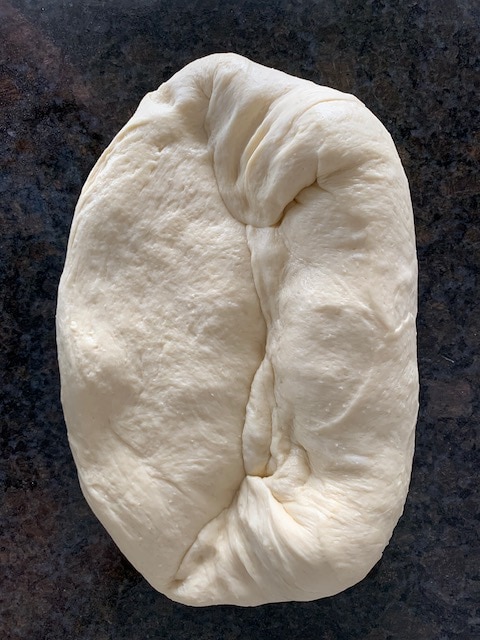
- Fold the dough over again.
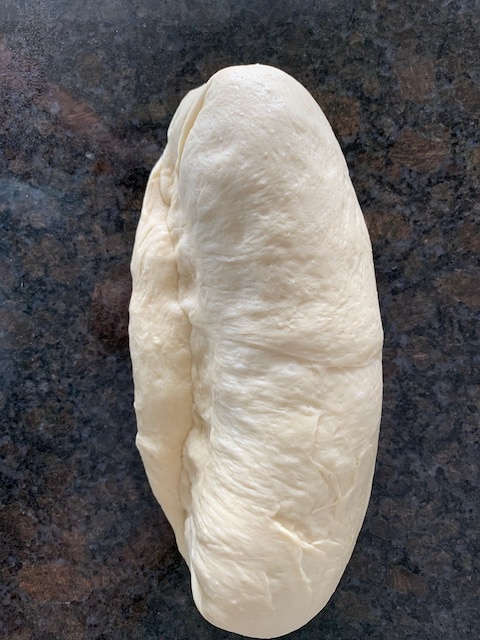
- Press the seam with the side of your hand to seal it.
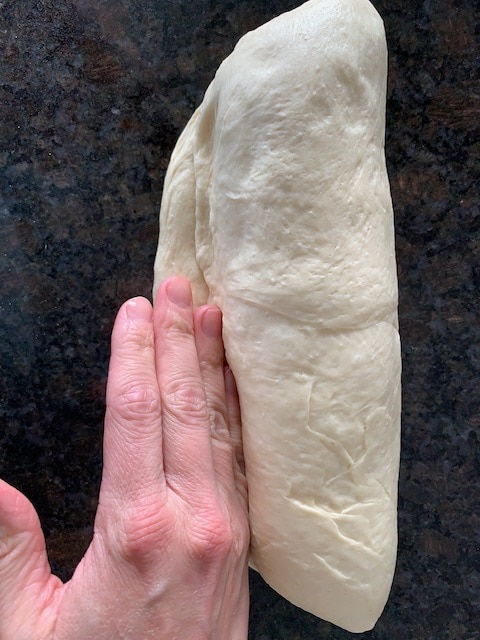
- Turn the loaf seam side down, pinch the ends under to seal them, and roll the loaf gently on the counter to even it out, and seal the seam well.
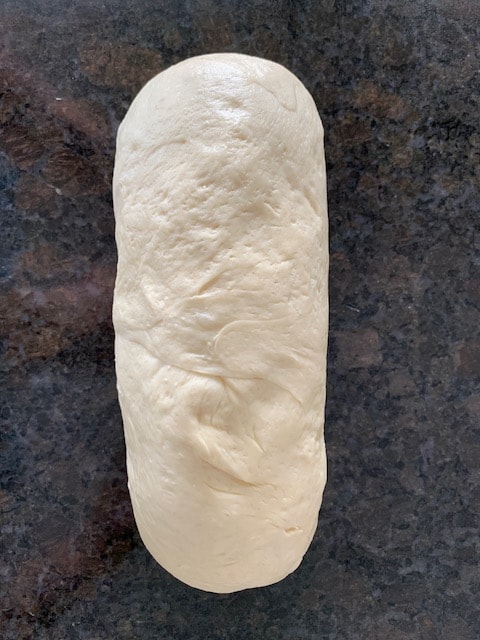
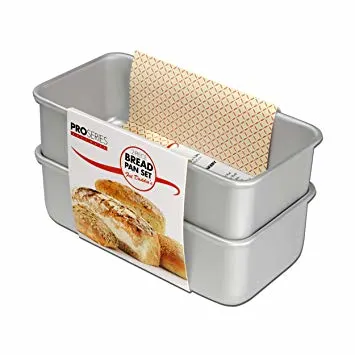
- Place the loaf, seam side down, in an oiled 8x4 inch loaf pan. Repeat for the second piece of dough.
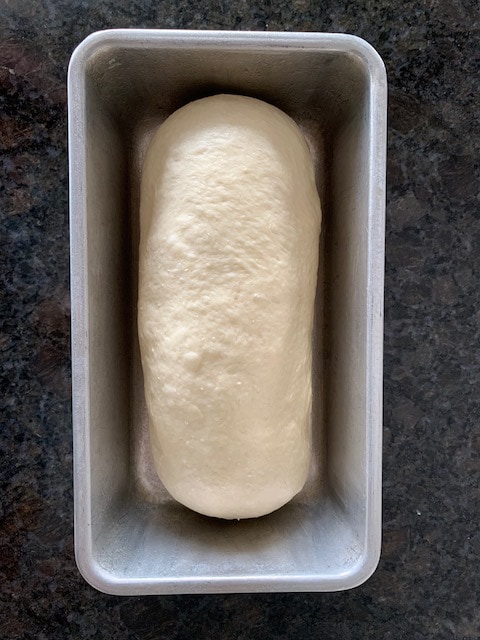
- Lightly spray the tops of the loaves with oil, and cover them loosely with plastic wrap. Let them rise until doubled, about 45-60 minutes.
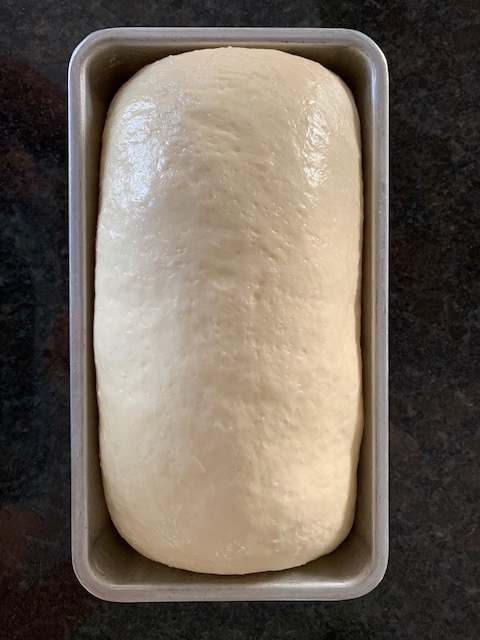
- Preheat the oven to 400 degrees F. Bake the loaves for 28-32 minutes, until golden brown.
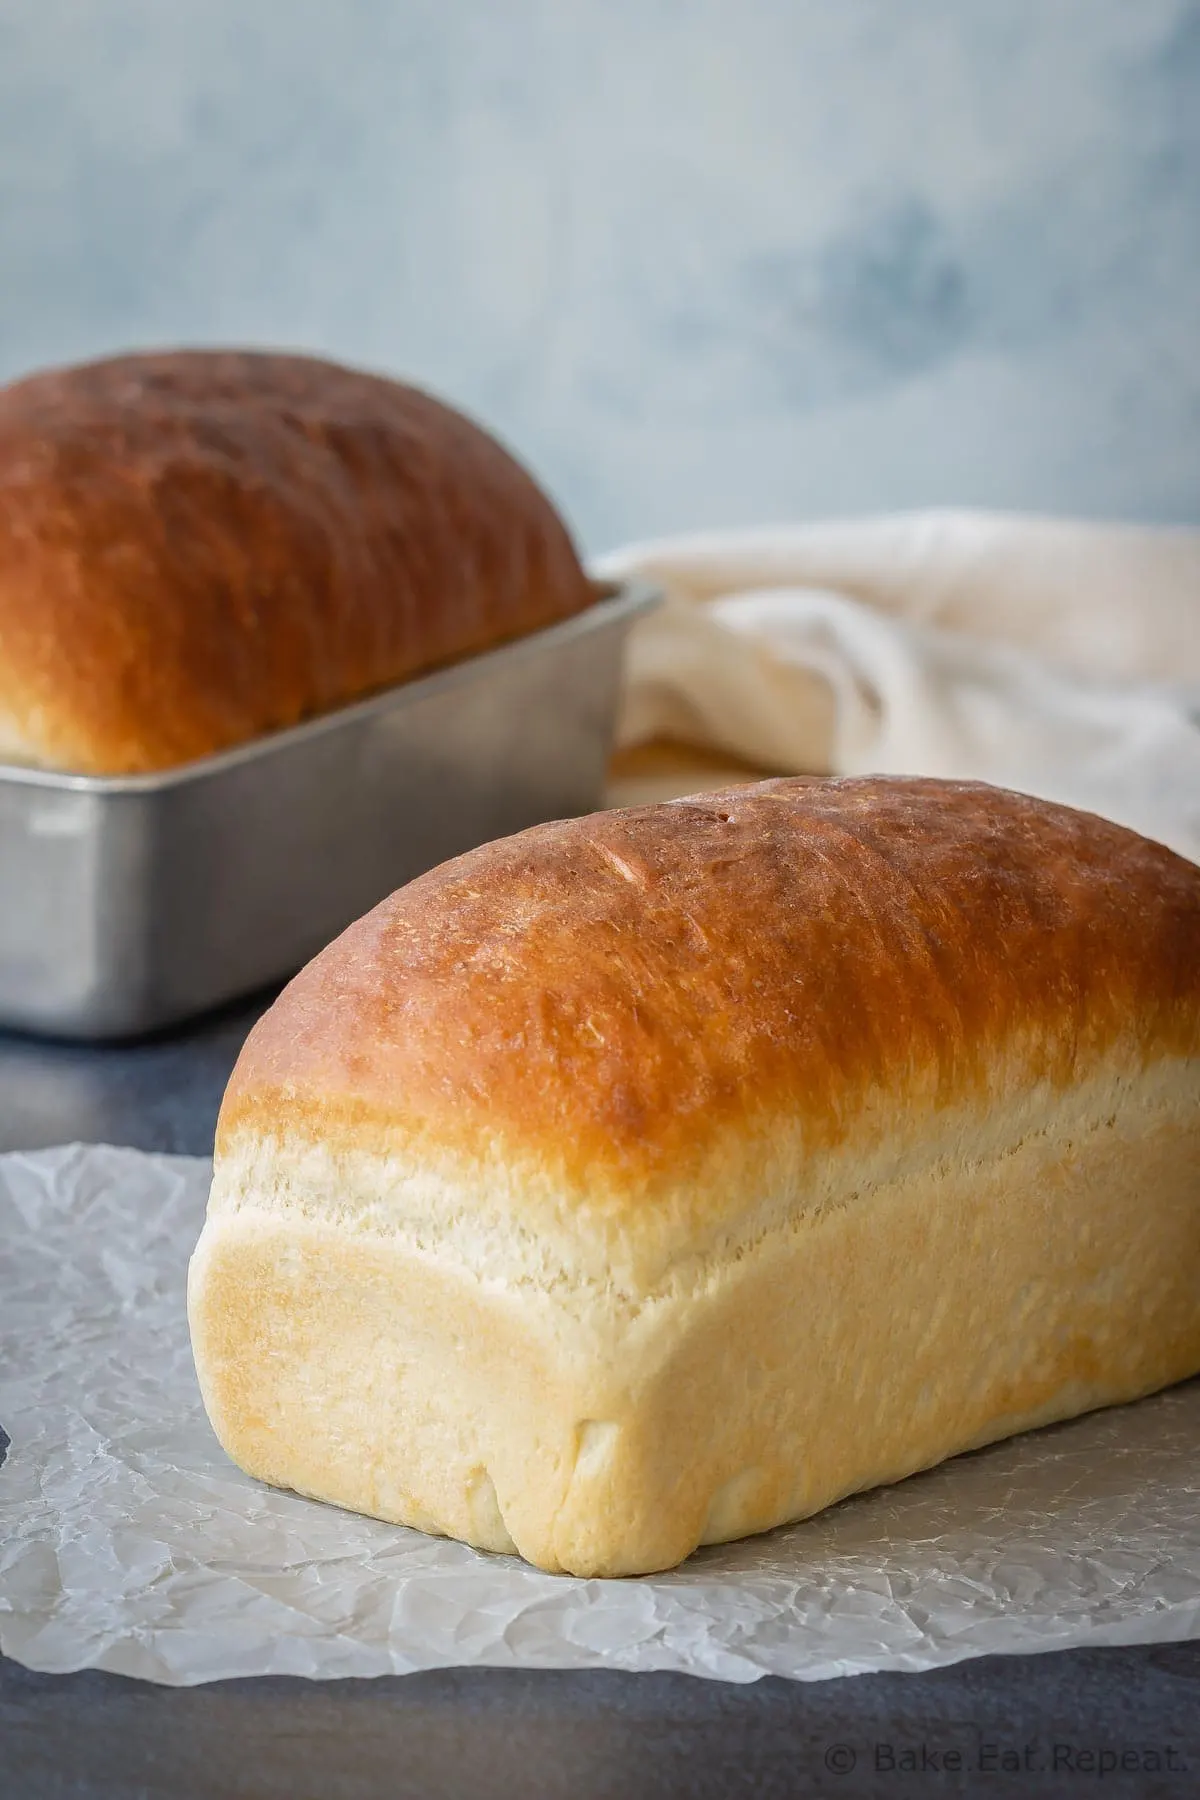
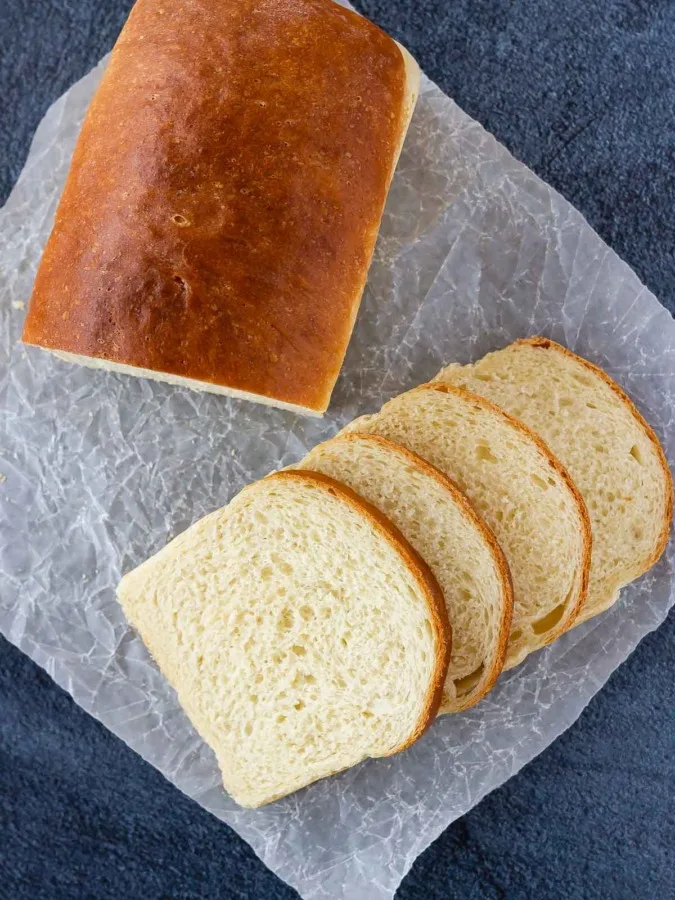
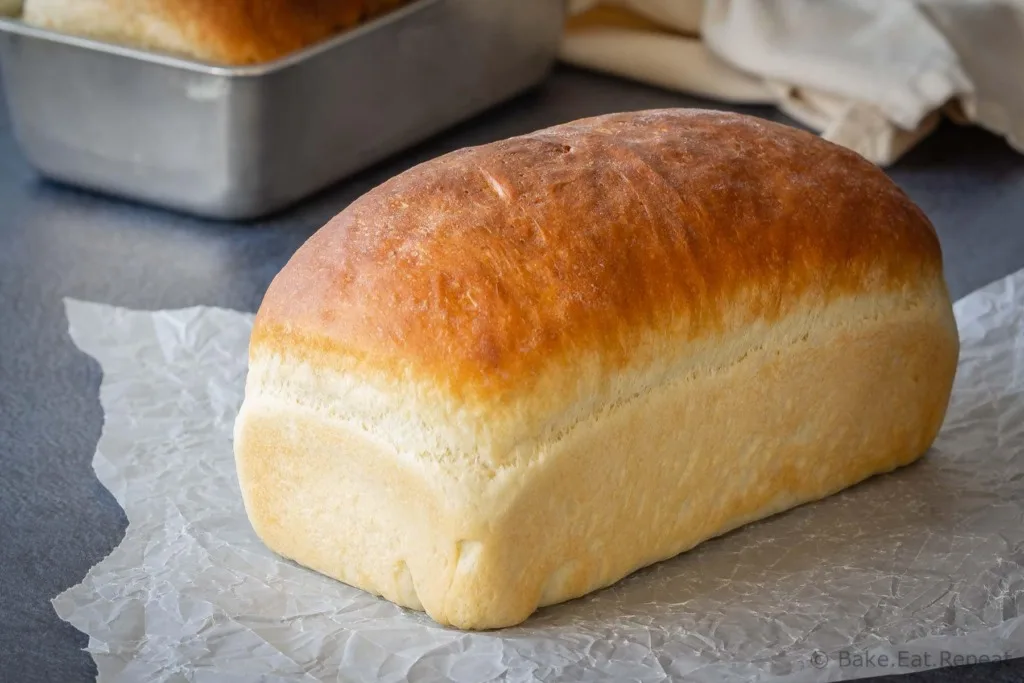
- Turn the loaves out onto a wire rack immediately, rub the tops of the loaves with butter if desired (this makes the crust a bit softer), and cool completely before slicing.
Notes
This recipe can be doubled to make 4 loaves of bread, as long as your stand mixer can handle up to 10 cups of flour, or you’re making it by hand.
Make sure to base the amount of flour you add on how the dough looks, not the exact amount you’ve added, as this can changed based on a number of factors, and won’t be exactly the same every time you make it. You want the dough to be smooth and slightly tacky, but not overly sticky. The step by step photos show you how your dough should look when it is correctly floured.
If you prefer to use active dry yeast, use 2 1/4 teaspoons, stir it into the warm water with a teaspoon of sugar, and let it sit for about 5 minutes to activate. Once it is foamy and bubbling, you can add it to the rest of the ingredients and continue with the recipe.
Recommended Products
This post contains affiliate links. As an Amazon Associate, I may receive a small commission from qualifying purchases.
Nutrition Information:
Yield:
30Serving Size:
1Amount Per Serving: Calories: 91Total Fat: 1gSaturated Fat: 1gTrans Fat: 0gUnsaturated Fat: 0gCholesterol: 3mgSodium: 152mgCarbohydrates: 17gFiber: 1gSugar: 1gProtein: 3g
Nutrition Information is estimated based on ingredients used and may not be exact.



Marg
Saturday 13th of March 2021
I like to go over the process as well while making the delicious whole wheat bread. It seems to get harder and harder to find a good bread in the store, we really enjoy this recipe.
Annie Calucin
Sunday 24th of May 2020
Thank you for sharing your recipes it is lovely to know that making bread has to go into certain process. No wonder my bread is always dense i short cut the process. Now am doing the right thing. Many thanks.