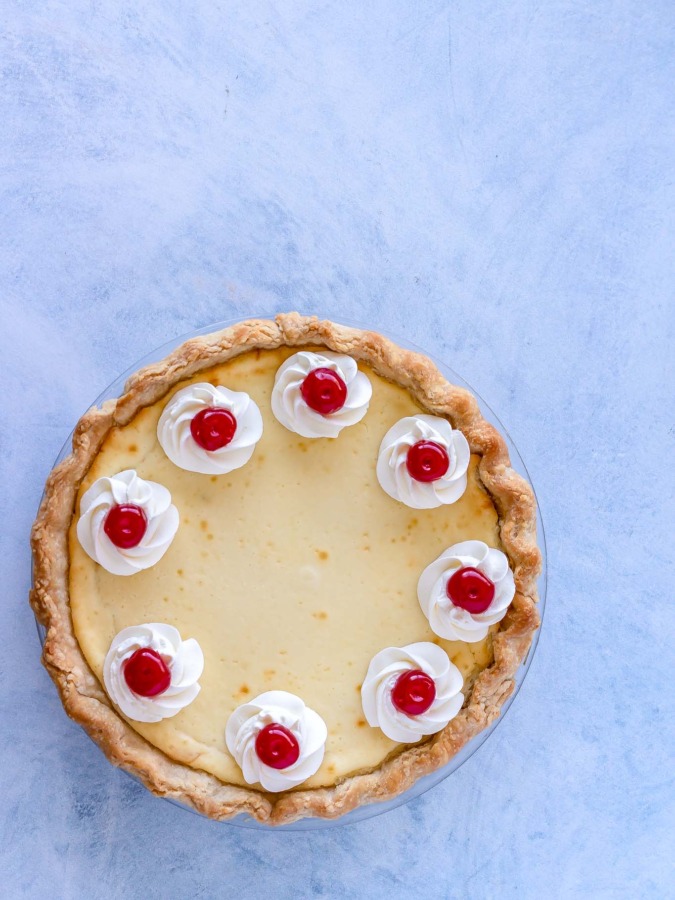

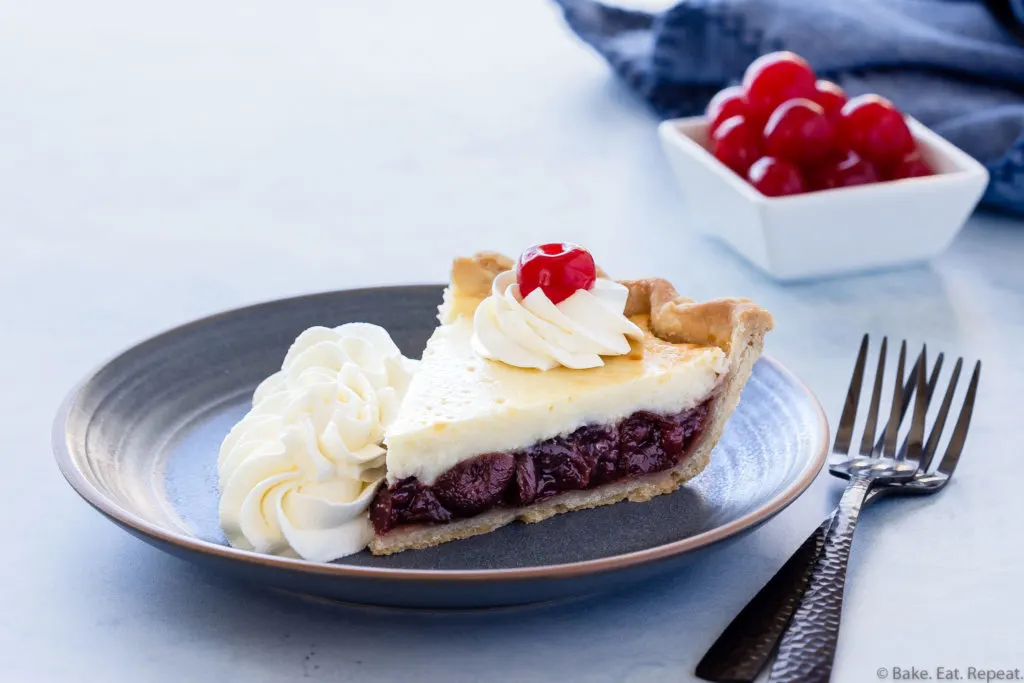
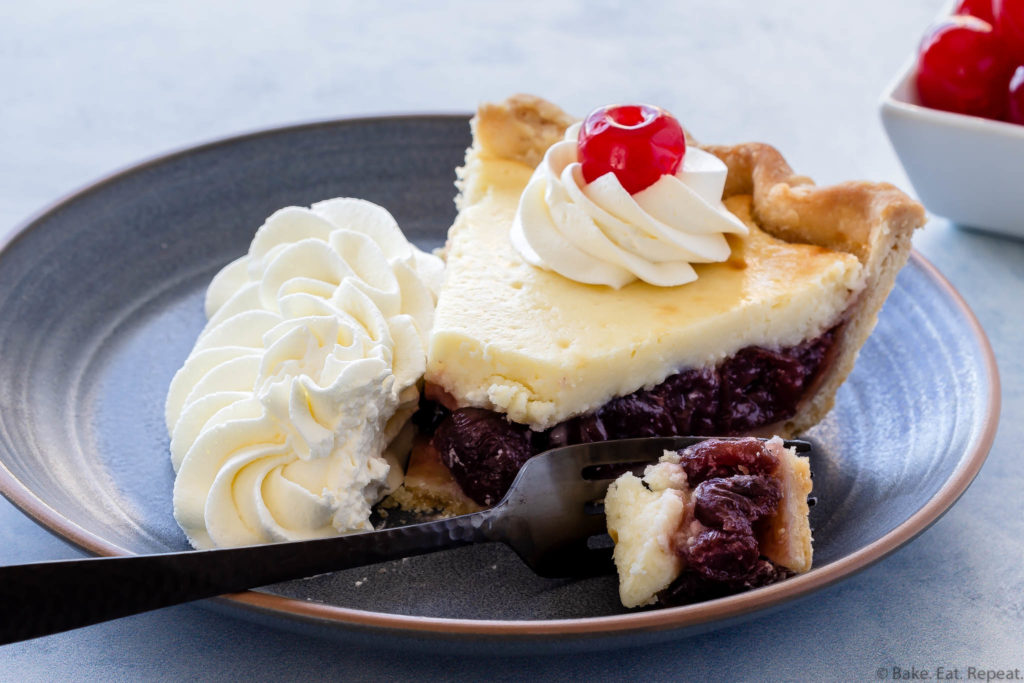
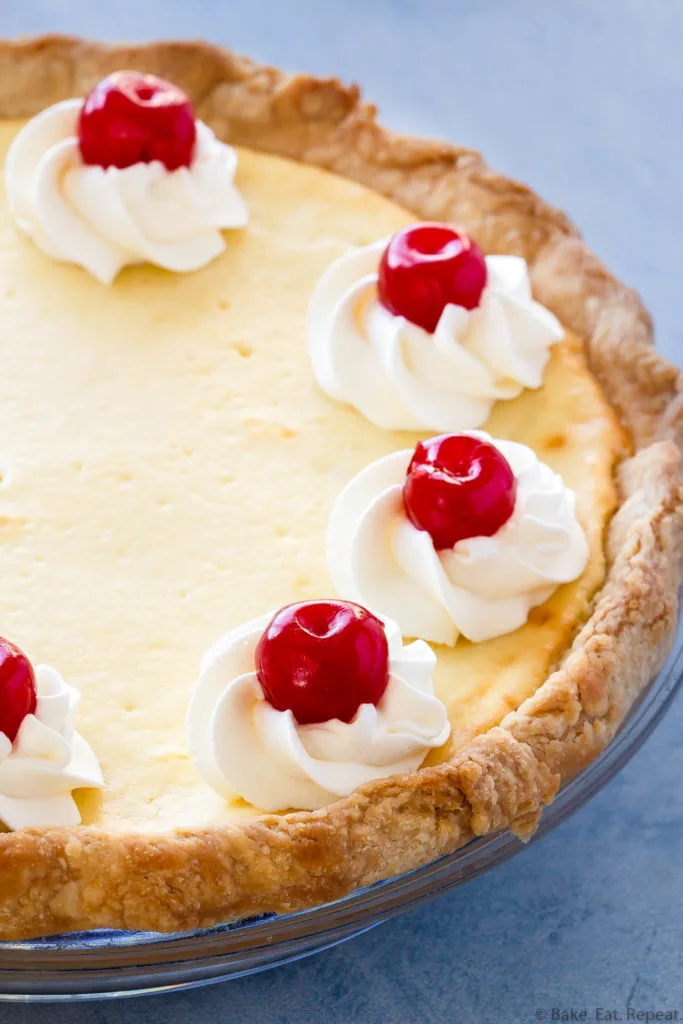
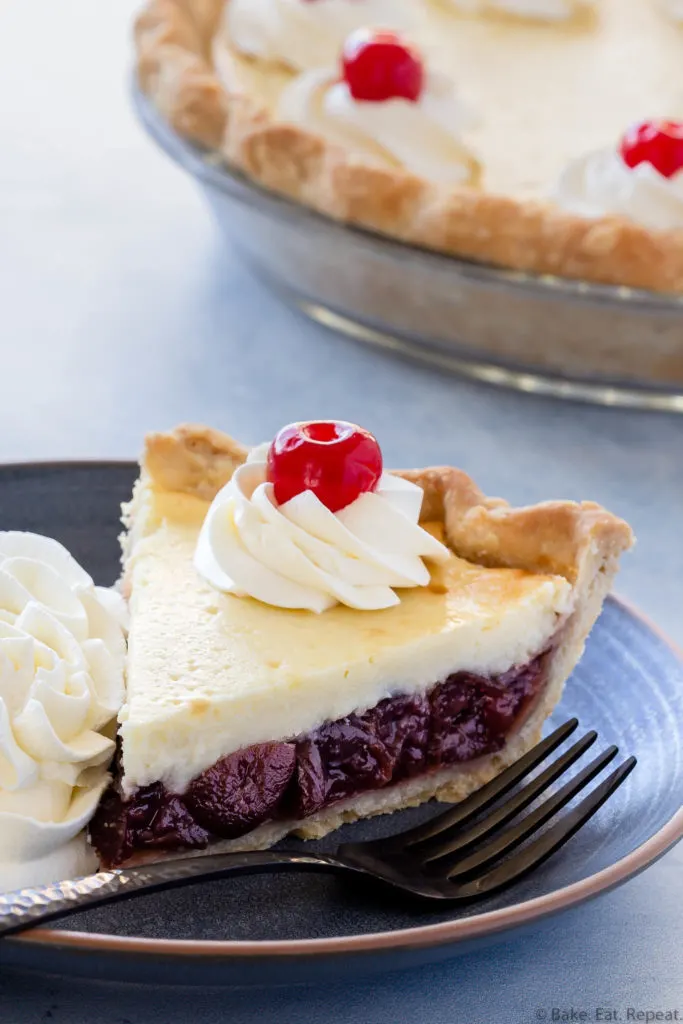
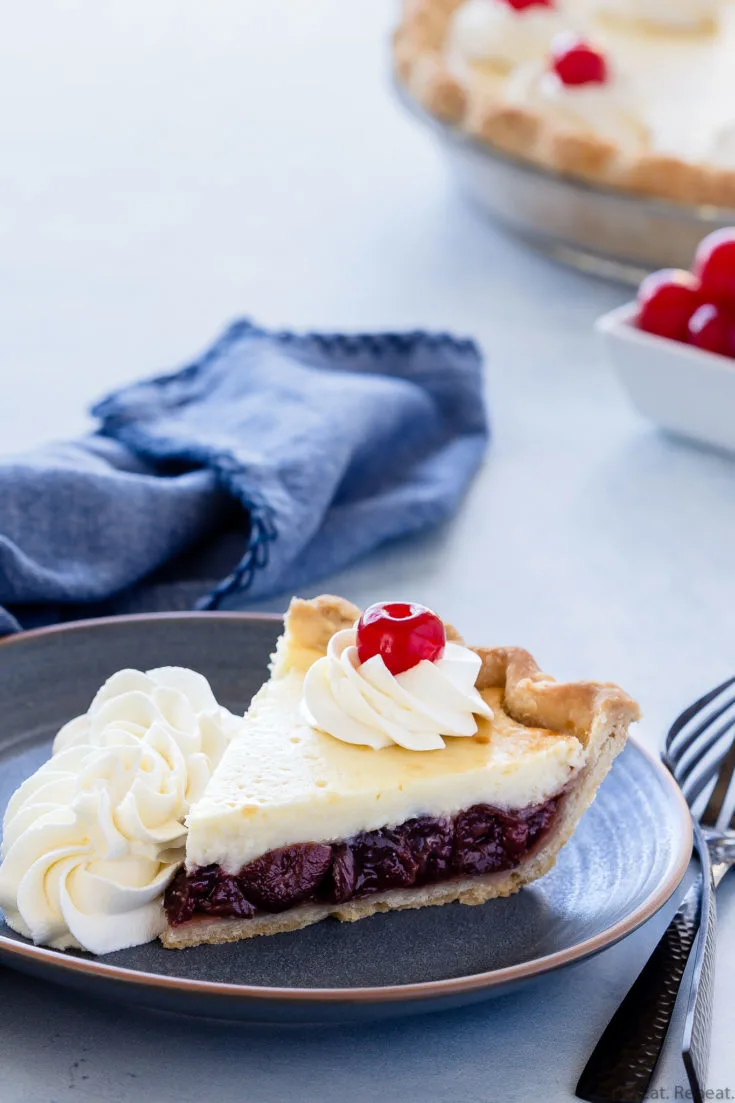
This cherry cheesecake pie is so easy to make, and tastes fantastic. Cherry pie with a layer of creamy vanilla cheesecake on top makes the perfect dessert!
Disclaimer: This post has been sponsored by Crisco Canada, and I have been compensated monetarily for my time. All opinions are, as always, my own.

Pie is one of the best desserts. Especially homemade pie.
This pie is even better, because it has an added cheesecake layer. Two favourites, cherry pie and cherry cheesecake, unite for one delicious dessert.

This pie uses canned sour cherries for the cherry pie filling. Make sure you use canned cherries, not cherry pie filling. The cherries are cooked on the stove for about 5 minutes with some sugar, corn starch, lemon juice, and almond flavouring to thicken them, before adding them to the pie.
The cheesecake layer is super quick and easy to make. Just whip some cream cheese until it’s smooth, and then mix in some sugar, eggs, and vanilla, and spread it on top of the cherry pie filling before baking.

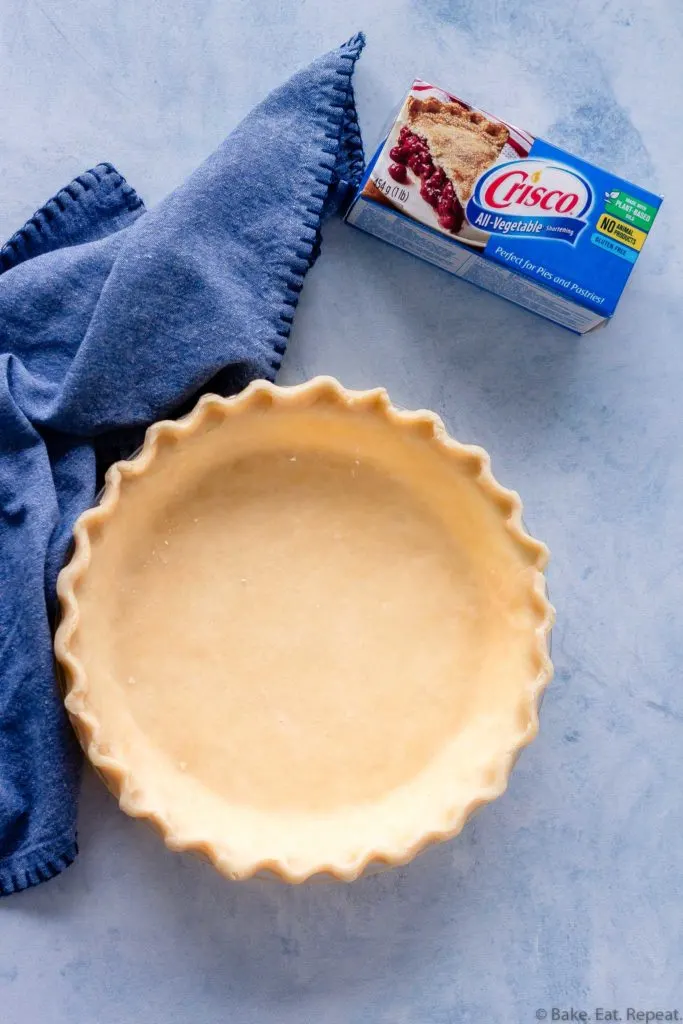
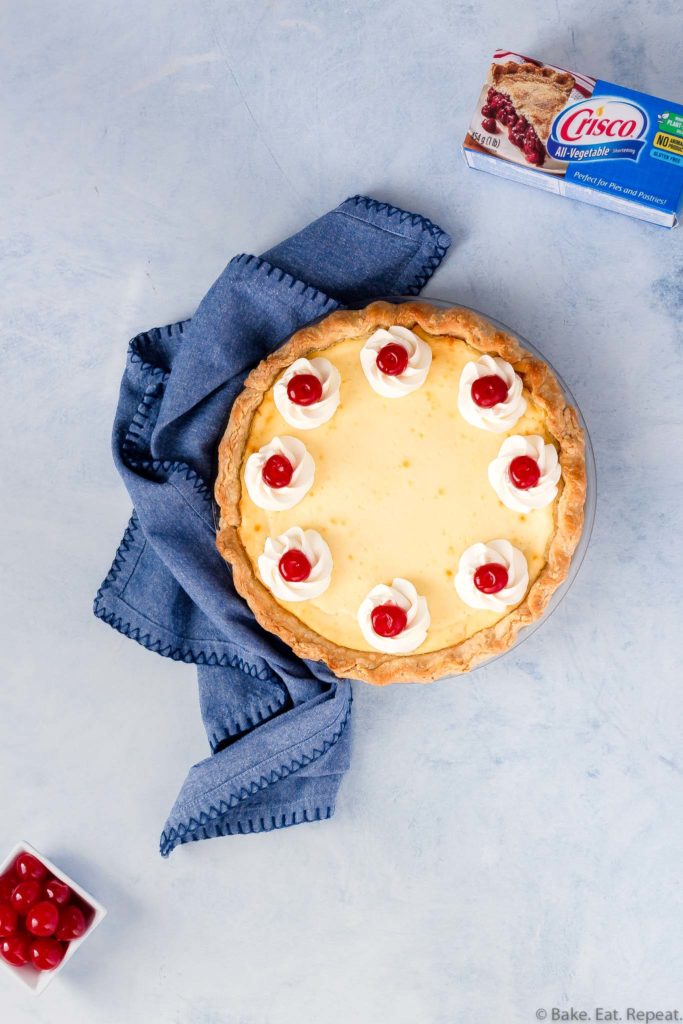
This pie crust is made with Crisco All-Vegetable Shortening, which is completely plant-based, is gluten free, and is half the fat of butter. It behaves the same way as lard in baking, producing perfect flaky layers in your pie crust that everyone will love.
If you haven’t ever made your pie crust from scratch, this recipe is the perfect place to start. Using Crisco in your pie crust results in a delicious, flaky pie crust every time. It’s easy to make, easy to roll out, and easy to eat. You will love this tasty pie crust!

Should I pre-bake my pie crust?
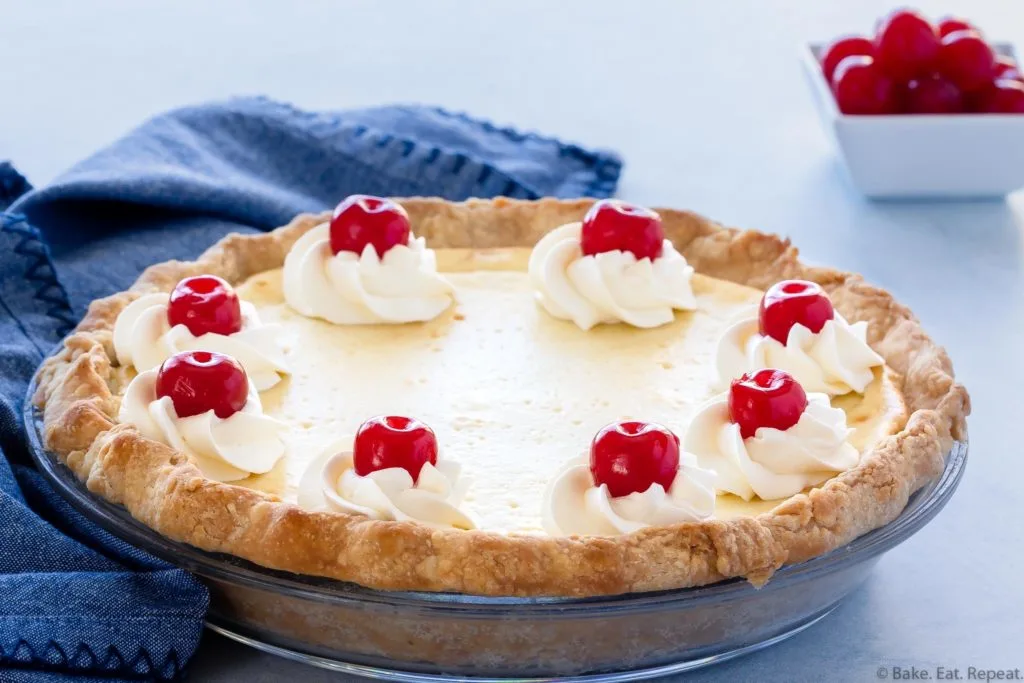
For this cherry cheesecake pie, you don’t need to pre-bake the pie crust. The pie is in the oven long enough for the pie crust to bake through at the same time as the filling bakes.
This pie crust bakes up perfectly golden brown and crisp, without needing to pre-bake it. Which is really just one more reason to bake this pie – one less step to take!

How do you tell if the cheesecake layer is done?
The most reliable way to tell if the cheesecake layer is finished baking, is by checking the temperature with an instant read thermometer. The internal temperature in the middle of the cheesecake layer should be 150F when it’s done baking.
If you over bake this cherry cheesecake pie, you will likely get some cracks forming in the cheesecake layer as it cools. That’s okay, it will still taste delicious, but if you prefer it to be crack-free, start checking the temperature of the cheesecake after about 25 minutes.

Can I make my pie dough ahead of time?
I almost always make my pie dough ahead of time, as it needs to chill before rolling it out. This Crisco based pie dough mixes up in just a couple of minutes, and then can be refrigerated for up to two days, or frozen for up to six months.
I really like this pie crust recipe from Crisco as it is very simple to make, and results in a crispy, flaky crust that rolls out very easily. It gives me a beautifully baked pie every time!


How to make Cherry Cheesecake Pie:
- Make sure your cream cheese is fully softened to room temperature before trying to make the cheesecake layer. If your cream cheese is still cold, it will be difficult to get the mixture smooth, and you will end up beating a lot of air into the cheesecake. This will result in some rising in the oven, and then subsequent cracking as the cheesecake cools.
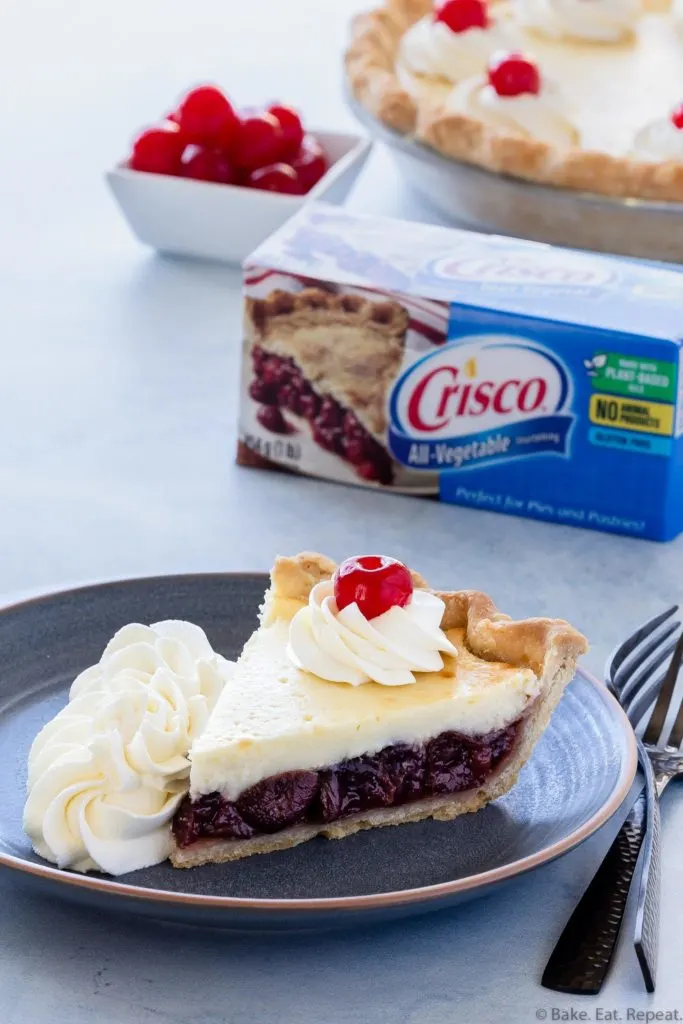
- Let this pie cool completely and then refrigerate it overnight before serving it. This will allow both the cherry pie filling and the cheesecake to set completely so that it slices nicely.
- This pie is best served cold. It will keep for 4-5 days in the refrigerator.
- The pie dough can be made up to two days ahead of time, wrapped tightly in plastic wrap, and kept in the fridge until you are ready to make your pie. It can also be frozen for up to 6 months.

Here are some more great pie recipes for you:

Cherry Cheesecake Pie

This cherry cheesecake pie is so easy to make, and tastes fantastic. Cherry pie with a layer of creamy vanilla cheesecake on top makes the perfect dessert!
Ingredients
For the pie crust:
- 1 1/3 cup all purpose flour
- 1/2 teaspoon salt
- 1/2 cup cold Crisco All-Vegetable Shortening
- 3-6 tablespoons ice cold water
For the cherry pie filling:
- 2 x 398mL (14.5oz) cans pitted red tart cherries packed in water or light syrup
- 1/4 cup reserved cherry liquid
- 1/2 cup granulated sugar
- 1 tablespoon corn starch
- 1 teaspoon lemon juice
- 1/2 teaspoon almond extract
For the cheesecake
- 1 1/4 packages (312.5g, 11oz) cream cheese, softened
- 1/2 cup granulated sugar
- 2 large eggs
- 1/2 teaspoon vanilla extract
Instructions
Make the pie crust:
- In a large bowl, stir together the flour and salt.
- Using a pastry blender, or two knives, cut in the Crisco All-Vegetable Shortening until the mixture looks crumbly, and the shortening pieces are the size of peas.
- Gradually add the water, 1 tablespoon at a time, stirring the mixture with a fork, just until the dough comes together.
- Use your hands to bring it together into a smooth ball, and shape it into a 1/2” thick disc. Wrap it tightly in plastic wrap and refrigerate it for at least 30 minutes and up to 2 days.
- When you are ready to make your pie, roll the dough out on a lightly floured surface to an even thickness, about 12 inches wide.
- Wrap the rolled dough around your rolling pin and transfer it to a 9” pie plate. Trim the edges to 1/2” (1cm) from the edge of the pie plate, and fold them under. Flute the edge of the pie crust.
- Chill the pie crust until you are ready to bake your pie.
Make the cherry pie filling:
- Preheat the oven to 425F.
- Drain the cherries, reserving 1/4 cup of the liquid.
- In a medium saucepan, whisk together the reserved cherry liquid, sugar, corn starch, and lemon juice until smooth.
- Stir in the cherries.
- Cook, stirring, over medium heat, until the cherry sauce has thickened, about 5 minutes.
- Remove the pie filling from the heat, and stir in the almond extract.
- Pour the cherry pie filling into the prepared pie crust.
- Bake for 15 minutes.
Make the cheesecake layer:
- While the pie is baking, make the cheesecake.
- In a medium bowl, whip the cream cheese with an electric hand mixer until smooth.
- Add the sugar, eggs, and vanilla extract, and mix until smooth.
- When the 15 minute bake time is complete, remove the pie from the oven and reduce the oven temperature to 350F.
- Spread the cheesecake mixture evenly over top of the cherry pie filling, and return the pie to the oven.
- Bake for another 30-35 minutes, or until the cheesecake is set, and an instant read thermometer reads 150F in the middle of the cheesecake.
- Let the pie cool completely on a wire rack at room temperature. Once it has cooled to room temperature, place the pie in the fridge to chill overnight before slicing and serving.
- This pie is best served cold. Store it in the fridge for up to 5 days.
Notes
Source: From Crisco Canada.
Recommended Products
This post contains affiliate links. As an Amazon Associate, I may receive a small commission from qualifying purchases.


Nutrition Information:
Yield:
8Serving Size:
1 sliceAmount Per Serving: Calories: 472Total Fat: 29gSaturated Fat: 12gTrans Fat: 0gUnsaturated Fat: 15gCholesterol: 65mgSodium: 199mgCarbohydrates: 49gFiber: 1gSugar: 30gProtein: 5g
Nutrition Information is estimated based on ingredients used and may not be exact.