

These are absolutely the best sugar cookies for making Christmas cut-outs. Soft, sweet, and so easy to make – and fun too!


Sugar cookies have never been my favourite Christmas treat. That was probably obvious when I said that I didn’t really like making cut-out cookies! They’re just kind of a pain. Way more time and effort than regular cookies, like these whipped shortbread. Those are just fast and easy. These….not so much.
But, as far as cut-out cookies go, these sugar cookies aren’t bad. And you can split up the work over a couple of days. I tend to make the dough one day, cut them out and bake the next, and decorate the next. Not sure if that’s better or worse, but it works for me.
In all honesty, I’d be perfectly happy never making sugar cookies at Christmas. I’ve just never really liked them all that much. The lack of chocolate perhaps? I don’t know. But, I can easily take them or leave them. I know I’m kind of alone in that though!


I will say that the only sugar cookies I was ever really tempted by growing up (yes, even as a child I didn’t love them, crazy I know) were the ones my aunt made. I’m not sure if it’s because hers were so pretty every year, or if they actually tasted better then most, but I did like to have one every Christmas. So, when I had kids, I decided I needed to get her recipe because kids like sugar cookies (well, most of them, I was crazy apparently) and clearly I needed to make some. I think it’s the addition of almond extract to these that makes me like them more than most. Whatever the case may be, these are soft and chewy (if you don’t roll them too thin, I have made that mistake for years and finally figured out that you can’t roll them super thin) and easy to make and my kids DO love them.
Mine aren’t as pretty as my aunt’s always are, she will glaze them all and then pipe royal icing detail on top of the glaze. I’ll admit, I don’t have the patience for that (if you do, make them that way – then you get the better tasting glaze covering the cookies and the pretty royal icing decoration!). Maybe when all the kids are old enough to help do it! For now, we glaze half of them so the younger kids can go crazy with the sprinkles, and my daughter and I use royal icing to flood the rest and make the fast and easy designs that you see in the pictures. The best of both worlds – cut out cookies, but not too insane in the decorating department!


Sugar Cookies


These are absolutely the best sugar cookies for making Christmas cut-outs. Soft, sweet, and so easy to make - and fun too!
Ingredients
For the cookies:
- 3 1/2 cups all-purpose flour
- 2 teaspoons baking powder
- 1 1/4 teaspoons salt
- 1 1/2 cups sugar
- 1/2 cup butter, softened
- 1/2 cup shortening
- 3 large eggs
- 1 1/2 teaspoons almond extract
For the royal icing:
- 1/2 cup water
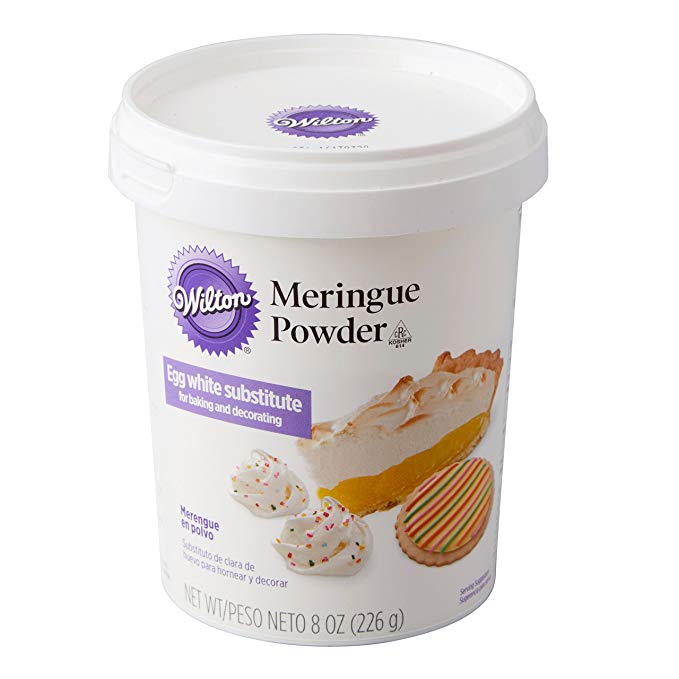
- 4 tablespoons meringue powder
- 1 pound (453g) icing sugar
- 1 teaspoon corn syrup
- 1/4 teaspoon almond extract
Instructions
- Mix together the flour, baking powder and salt.
- In a stand mixer, or with an electric mixer, cream together the sugar, butter and shortening until light and fluffy.
- Add the eggs and almond extract and mix well.
- Add the flour mixture and mix again until well combined.
- Divide the dough into 4 pieces and wrap each with plastic wrap and then chill it until it is firm, 2-3 hours or overnight.
- Preheat the oven to 375 degrees F.
- Working with one piece of dough at a time, roll it out on a lightly floured surface to 1/4” thickness. Don’t roll it out too thin or your cookies will be crisp instead of soft and chewy.
- Cut out your cookies and transfer them to a baking sheet.
- Bake for 8-10 minutes until they are just barely browning on the edges. We actually prefer them to be white - just before they start to brown. Repeat with the remaining dough.
- Allow the cookies to cool for 5-10 minutes on the cookie sheet before removing them to a wire rack to cool completely.
- To decorate the cookies, we do it two ways. You can either spread them quickly with glaze (I just mix icing sugar with a bit of almond extract and enough milk to make it runny - about 1 cup sugar to 1-2 tablespoons milk) and sprinkles, or use royal icing to make designs, like in the pictures here. The simple glazed ones DO taste better, but the royal icing looks prettier - so whichever you’re going for - we like a combination!
- To make the royal icing, combine the meringue powder and the water in the bowl of a stand mixer. Add the icing sugar and mix well.
- Add the corn syrup and almond extract and beat the mixture for 5-7 minutes until stiff peaks form.
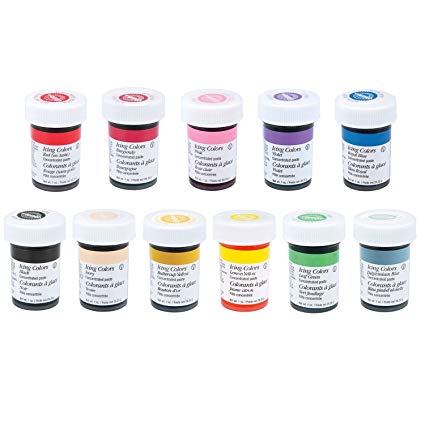
- Divide the icing into different bowls depending on how many colours you want to make and tint each of them. I like to use the gel food colouring to get brighter colours.
- Keep any icing that you’re not working with covered as it hardens quickly when exposed to the air.
- In order to do the decorating shown in the pictures, you need piping icing (which is what we just made) and flooding icing. To make flooding icing, you add water to the tinted icing, a teaspoon at a time, until it is thin enough that when you allow a spoonful to drizzle back into the bowl of icing, the “ribbon” of icing will disappear in 2-3 seconds.
- After tinting, I take out some of each colour and thin it out to make this flooding icing.
- The piping icing I then put into piping bags, and the flooding icing I put into squeeze bottles.
- To decorate, pipe around the edges of the cookies and then fill them in with the flooding icing, using a toothpick to spread the flooded icing right to the piped edges and to remove any air bubbles.
- Let that icing set for about a minute, and then you can use the other colours of flooding icing to make designs by squeezing dots or stripes onto the flooded cookie. You can then use a toothpick, dragging it through the stripes or dots to create different designs if you like.
- I usually work with 3-4 cookies at a time, edging all of them, then flooding all of them, then going back and adding designs to all of them.
- Allow the cookies to set overnight before storing them in an airtight container. They can be frozen for up to 3 months.
Notes
You can use all butter instead of half shortening in these cookies. I tend to use half shortening as it makes them a little firmer and less likely to all break while icing them with small children! If that’s not a concern you can use all butter instead. You can also replace the almond extract with vanilla if you like.
Source: From my Aunt Catherine.
Recommended Products
This post contains affiliate links. As an Amazon Associate, I may receive a small commission from qualifying purchases.

Nutrition Information:
Yield:
72Serving Size:
1 cookieAmount Per Serving: Calories: 93Total Fat: 3gSaturated Fat: 1gTrans Fat: 0gUnsaturated Fat: 1gCholesterol: 12mgSodium: 64mgCarbohydrates: 16gFiber: 0gSugar: 11gProtein: 1g
Nutrition Information is estimated based on ingredients used and may not be exact.
Catherine Chevalier
Saturday 11th of December 2021
That is sweet of you Stacey to give me the credit for your beautiful cookies. I have always admired your designs too!! YES, I always do these in 3 days…. And still can’t get out of making them for my “children” (38/41/43) ha ha That is the only way it is not exhausting for me…I am getting old? I have discovered over the years that I can buy Pasteurized egg whites now in a 500 ml. container and I like the taste of this icing better than the taste of the meringue powder icing. Of course I only use a small amount of the whites for the icing so then I use the rest for egg white omelette!! I love your site! Keep up the great work of providing us with new and interesting recipes!! Aunt Catherine
Stacey
Monday 13th of December 2021
You'll have to send me the recipe for icing with egg whites - I don't love the taste of the meringue powder icing either, although the kids don't seem to care! Glad you like the site! :)
Nora | Savory Nothings
Thursday 17th of December 2015
Sugar cookies are SO time consuming! Any cut out cookies are, that's why I usually just eat them but don't make them ;) It's a really good idea to spread out the work over a few days, I need to try that!
stacey
Thursday 17th of December 2015
That's the only way I can handle making them - spreading it out! :)
Jess @ Flying on Jess Fuel
Wednesday 16th of December 2015
These are SO CUTE!! I love the festive little trees best-- they're so Dr. Seuss-esque. Adorable!
stacey
Wednesday 16th of December 2015
Hahaha, yeah I guess they are Dr. Seuss-ish! I liked the trees the best too! Thanks Jess!
marcie
Wednesday 16th of December 2015
Sugar cookies are time consuming, but I try to make them every year and have the kids help me decorate. They're a tradition and everyone loves them! Yours are gorgeous, Stacey -- mine don't look half as pretty as these!
stacey
Wednesday 16th of December 2015
They are definitely a tradition. I actually wasn't going to make them - but as soon as I started Christmas baking my kids were asking when we were making these - so that idea went out the window! And....I didn't take photos of the majority of them, most were quickly slathered with glaze and attacked with sprinkles by the kids - those weren't as pretty, but tasted great! :)
Gayle @ Pumpkin 'N Spice
Wednesday 16th of December 2015
I've never made cut out sugar cookies before! These look absolutely gorgeous, Stacey! I love your pretty frosting! What a show stopper for the holiday dessert table!